
DIY Gallery Wall Layouts: 7 Perfect Formulas (Easy Guide + Examples)
Creating a gallery wall is one of the quickest ways to transform a blank wall into a beautiful, personal statement. But figuring out where to start—and which layout actually works—can feel overwhelming. The good news? You don’t need to be an interior designer to build a stunning gallery wall.
In this guide, we’ll walk through 7 foolproof gallery wall formulas you can use in any room. Whether you prefer clean lines or eclectic charm, there’s a layout here that will fit your space and style.
⭐ Why Gallery Wall Layouts Matter
A gallery wall isn’t just a collection of frames—it’s a composition. The right layout creates:
Balance and visual flow
Consistency in spacing
Harmony between artwork styles
A polished, intentional look
Think of it like arranging furniture: the layout makes or breaks the room.
7 Perfect Gallery Wall Formulas
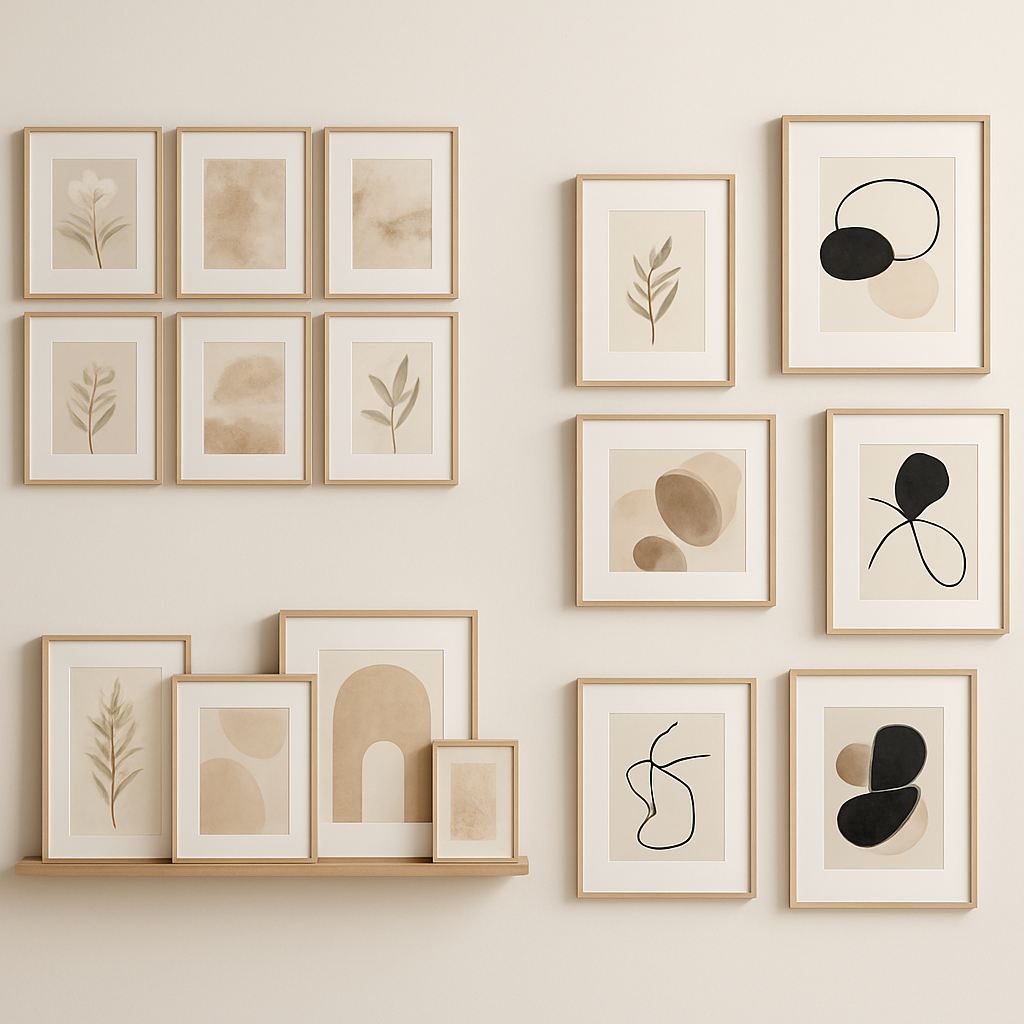
1. The Grid Layout (Clean + Modern)
Perfect if you love order and simplicity.
How it works:
Use frames of the same size arranged in a symmetrical grid—usually 2x3, 3x3, or 4x4.
Why it works:
Offers instant modern sophistication
Great for minimalists
Looks professional without much effort
Best for:
Hallways, above sofas, office walls.
Pro Tip: Keep spacing consistent—usually 2–3 inches between frames.
2. The Classic Row (Horizontal or Vertical)
A simple, sleek solution that adds structure to a space.
How it works:
Line up frames of uniform or varying sizes along a straight axis.
Why it works:
Creates a sense of order
Draws the eye across the room
Perfect for long narrow spaces
Best for:
Hallways, staircases, above beds.
3. The Eclectic Cluster (Artistic + Personal)
When you want your gallery wall to feel organic and creative.
How it works:
Mix different sizes, orientations, and frame styles. Start with one “anchor” piece and build around it.
Why it works:
Adds personality
Perfect for collectors
Looks great with a mix of photos, prints, and décor items
Best for:
Living rooms, creative studios, entryways.
Pro Tip: Use the “center-out” rule—place your largest piece in the middle and arrange others around it.
4. The Column Layout (Tall + Elegant)
A vertical display that elongates your walls.
How it works:
Stack 3–6 frames vertically, keeping equal spacing between each.
Why it works:
Makes ceilings look higher
Adds visual height
Great for tight or narrow areas
Best for:
Between windows, beside door frames, bathroom walls.
5. The Shelf-Based Gallery (Flexible + Changeable)
A gallery wall you can update without making new holes.
How it works:
Install 1–3 picture ledges and layer artwork by leaning frames instead of hanging them.
Why it works:
Incredibly versatile
Perfect for seasonal swaps
Adds dimension through overlapping frames
Best for:
Living rooms, bedrooms, children’s rooms.
6. The Asymmetrical Balance (Modern + Natural)
Perfect if you like an organized look that still feels relaxed.
How it works:
Mix sizes but maintain balance by placing heavier or larger frames diagonally from each other.
Why it works:
Looks curated yet not rigid
Easy to expand over time
Works with mixed media
Best for:
Above furniture like sofas, consoles, or sideboards.
7. The Statement Symmetry (Centerpiece + Supporting Pieces)
A structured layout with a bold emphasis.
How it works:
Choose a strong hero piece—something large or visually striking—and surround it with smaller complementary frames in a mirrored pattern.
Why it works:
Creates a focal point
Feels intentional and cohesive
Works with themed artwork
Best for:
Dining rooms, living rooms, entryway walls.
🎯 How to Plan Your Gallery Wall (Quick Checklist)
Before you start hanging, use this quick checklist:
✓ Choose a consistent color palette
✓ Decide on frame colors and materials
✓ Lay out your design on the floor first
✓ Use painter’s tape to mock up sizes on the wall
✓ Keep spacing even (2–3 inches is standard)
✓ Hang frames at eye level or around 57–60 inches from the floor
🎨 What to Include in Your Gallery Wall
Mixing media adds depth and visual interest. Consider including:
Art prints
Canvas pieces
Framed photos
Quotes or typography
Mirrors
3D objects (dried flowers, woven elements, etc.)
Floating frames
Combining textures creates a gallery that feels elevated and professionally styled.
🛒 Want Ready-to-Hang Wall Art?
If you’re looking for artwork that fits these gallery wall formulas perfectly, I can help you create themed collections or product suggestions that plug directly into this blog post. Just say the word!